I realized that I had never gotten around to doing an unboxing for the Assault on Black Reach set so here I go!
This set is great in the value for money front.
I got this box at a 50% discount during the closing down sale of a local store for only SGD$65 (approx £32.50).
Even at full retail price, it is a steal.
Contents:
46 Miniatures
Dice, Dases, Templates, Range Finders
Rulebook & "How to Play" Booklet
Standard stuff here, range-finders, templates, bases and dice.
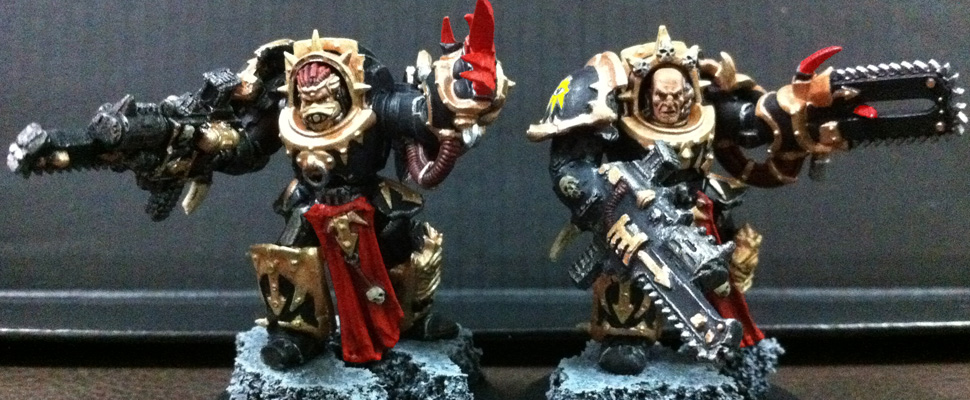
The box contains 4 sprues and this is the 1st. Very easy to assemble snap together parts that still have a high level of detail.
This particular frame contains only Space Orks.
On to the 2nd frame, which has a mixture of Space Marines and Space Orks.
This 3rd frame is a duplicate of the one above.
And the 4th frame, with mostly Space Marines, 2 Orcs and a Dreadnought.
Last but not least, we have the "How to Play" Booklet and a mini Rulebook
The mini rulebook is really nice, portable and adds superb value to this set considering that the retail price of the full-fledged rulebook is £45.
All things considered, this set is a great buy. Now that Dark Vengeance is out, Black Reach sets may possibly be discounted at some hobby stores. If u play Space Marines or Orks, grab a box before they vanish from the shelves!
Read more
After many nights of ogling at pictures of the Dark Vengeance miniatures on the Games Workshop site, I finally got my hands on the Limited Ed. boxed set!
The box itself has a nice finishing and looks really good.
Here's the back where you can see all the models nicely painted up and this is what makes you really wanna buy it.
The contents include:
48 miniatures + 1 Limited mini
Dice, Bases, Templates and Range Finders
Quick Reference Sheet, Rulebook and a 'How to Play' Booklet
And.... the unboxing begins!
Surprisingly, there are only 4 main sprues and 1 additional sprue for the limited ed. miniature.
For a moment, I thought that my box may have sprues missing until I saw the number of figures that are jam packed into each of those sprues.
As with the other starter sets, this comes with the run-of-the-mill range finder and assorted templates.
The dice and bases are neatly packed but I'm sure you aren't really reading this to find out about the bases and dice so....... next please....
Now we get to the items of interest!
Here is the 1st sprue, with a mix of chaos and dark angel figures.
The miniatures are extremely detailed expecially when you consider the fact that they are mostly composed of only 2 parts.
If you own Assault on Black Reach and thought the minis there were good, these are way better!
The 2nd sprue is a duplicate of the one above.
I will have to vary my paintjob here and there for the sake of variation.
Now this 3rd sprue looks very impressive with the organic-like internal sprue frame.
Here you can really appreciate how tightly packed the figures are and every one of them is perfectly casted.
Kudos to GW for achieving this impressive feat.
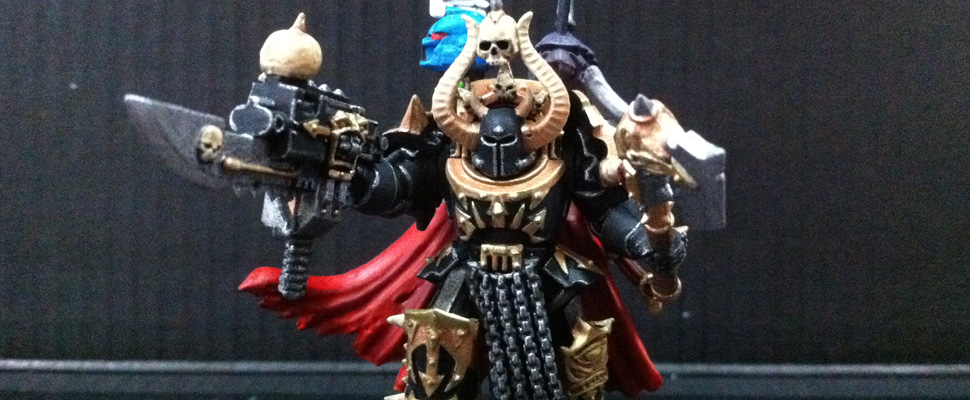
And the 4th frame, with the highlight of the set.... the Helbrute.
The sculpt is absolutely awesome and I can totally imagine how badass this guy is gonna look once I paint him up.
And finally, the limited Interrogator Chaplain Seraphicus that comes with a nice textured base.
The head of my Chaplain has come off the frame but FYI, it is supposed to be attached to the bottom left of the sprue.
For some reason, this limited ed. figure seems to totally justify the purchase of this boxed set!
XD
Lastly, there are the Quick Reference Sheet, Rulebook and a 'How to Play' booklet.
One thing to note is that the Rulebook here is full-colored with updated rules, weapons and such. It's like the rulebook from the Assault on Black Reach Set but this one is on steroids!
Very high quality stuff here. IMO, this is the best GW starter set ever made. Highly recommended, so get yours while the limited edition is still available.
Read more
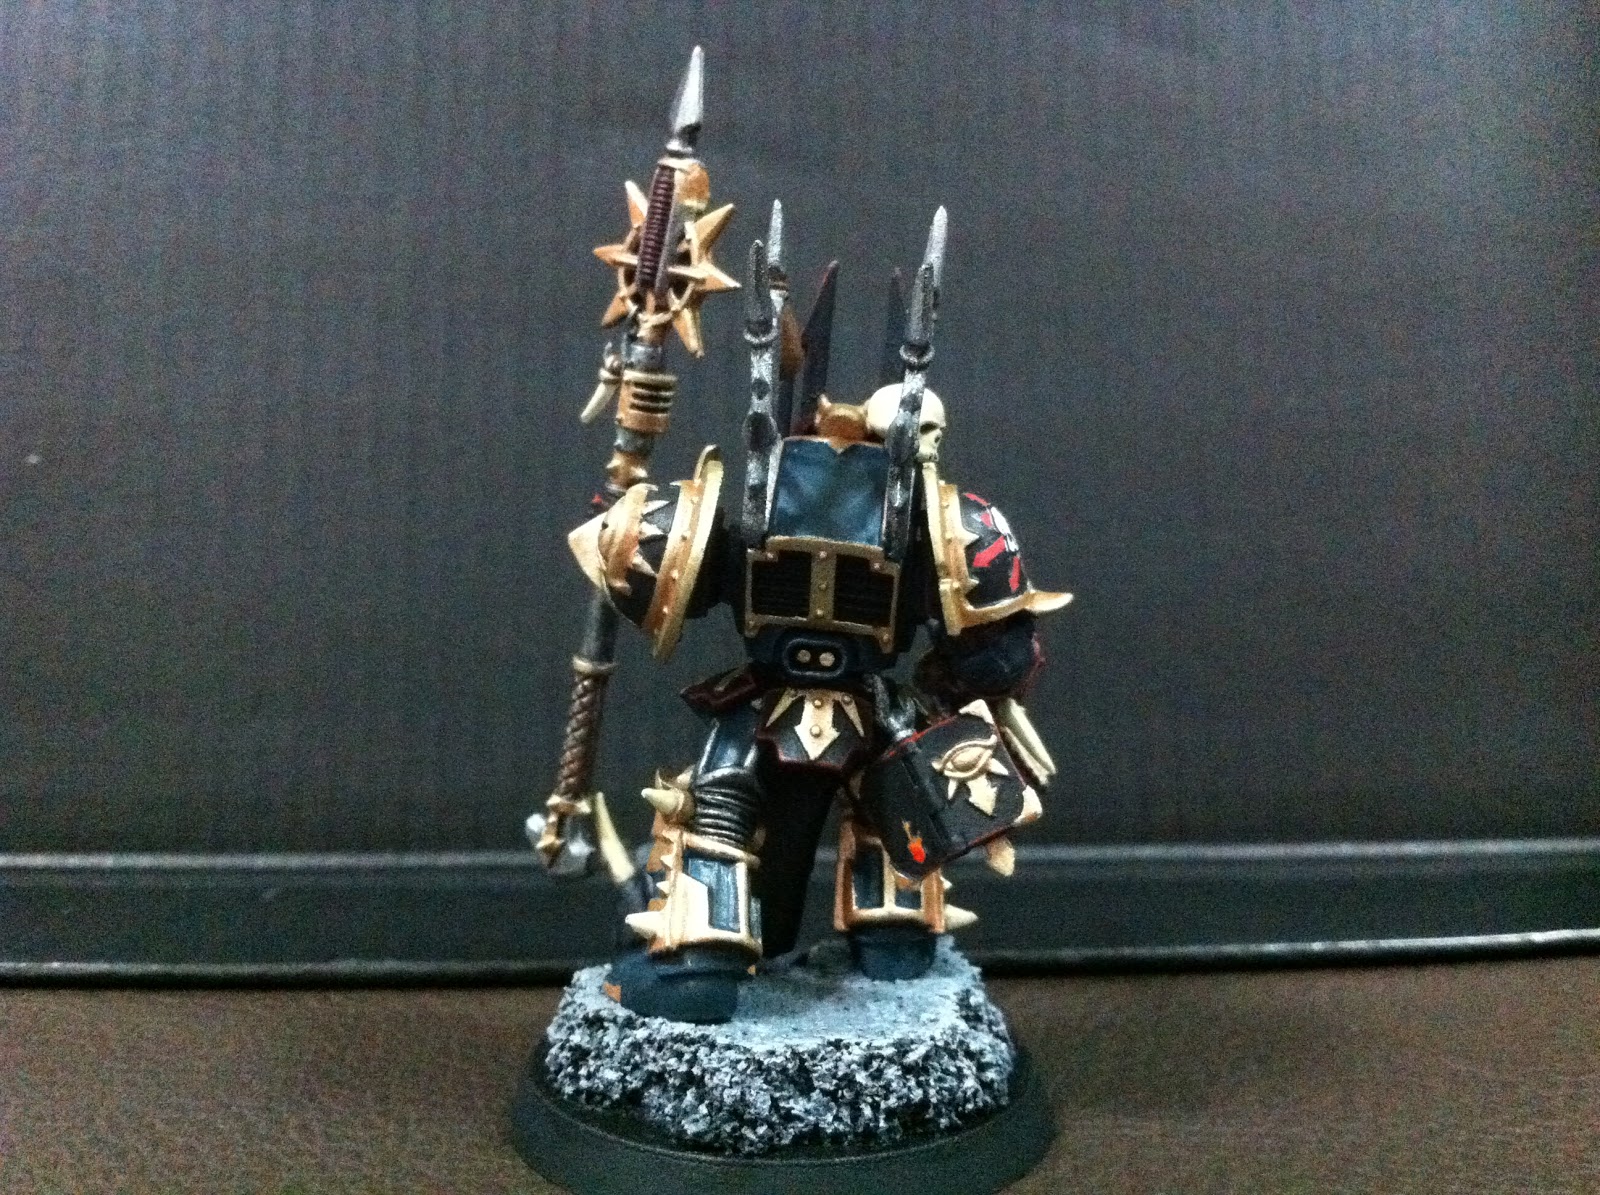
Added a backpack to my previously repainted Chaos Lord on Juggernaut
This used to be a badly painted model that I bought off eBay at a crazy price of $2.... really...
It was missing a backpack but I managed to get the part in a separate purchase and have added it to the model
I stripped horrible paint job, carefully removed the caked-on superglue and redid it in my army's colours
Some details such as the left torso area & left shoulder pad were marred by the superglue but have been carefully painted over to disguise the defects
It has come a really long way since its' initial condition and I am extremely satisfied with the result
Read more
Finally done!
Click on a image and use your mouse wheel to rotate the figure for a 360 degree view
Used the same decals and paint scheme as pictured on the GW website
Will be adding flock to the base once my order for static grass comes in
Did some edge lining on the tome
Spent quite some time on the minion as well.
Didn't have purple so I mixed Red and Blue in varying amounts to create a base tone and a highlight for the face and hands.
Close up of the tome
Read more
18 hours of work went into this model thus far and it's nearly done!
The red and blue edge lining look very bright in the images but this is due to the extremely bright lighting.
Under normal lighting, the edge lining is much more subdued.
Check out the eye on the staff... And the details on the spell tome bottom left of the image.
The back view. The extreme edge lining on this model is the best lining work I've done so far, very neatly done and ruler straight, especially on those waist flaps.
Read more
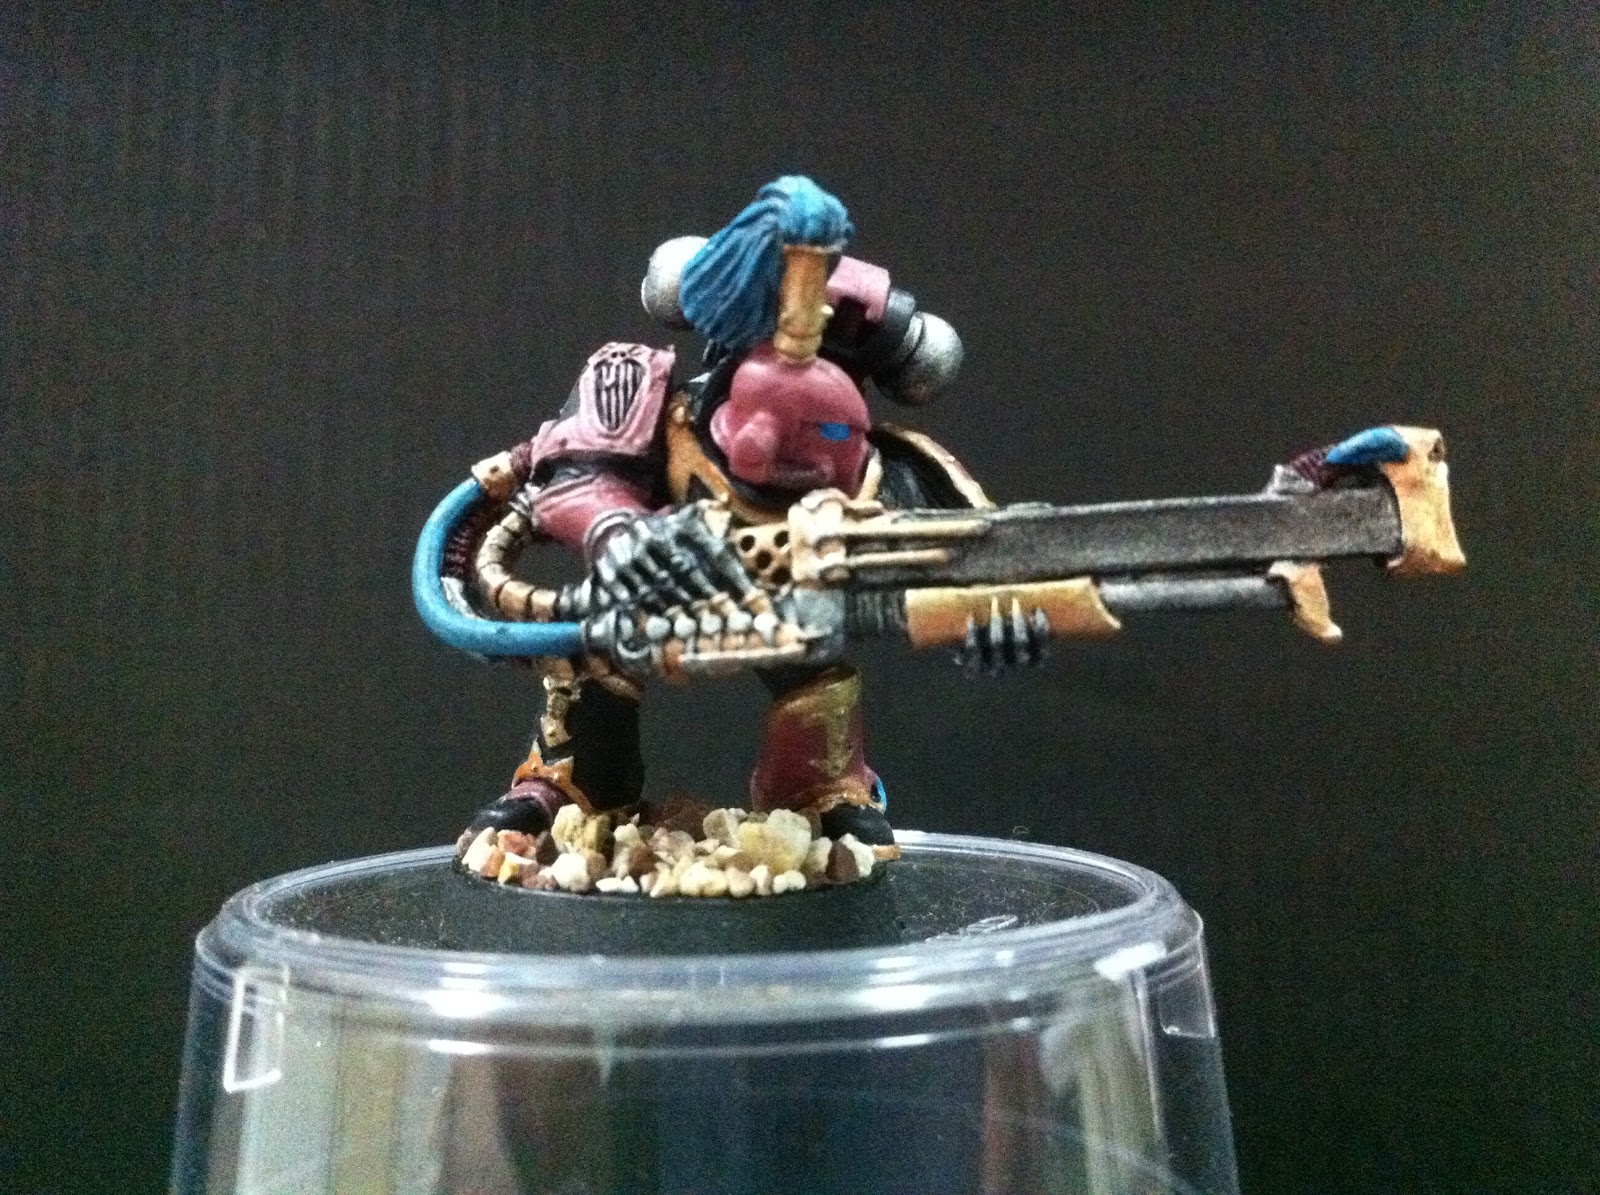
Salvaged a trash-painted noise marine that came in an eBay lot.
Had to strip the old paint and put in a lot of knife work to get rid of the huge gobs of superglue all over.
Notice that the posture of the marine is rather odd, with the upper body hanging way out...
This is due to the way the previous owner had glued it. From this back view it can be seen that the ball joint for the torso is more than half exposed!
Had to glue two coins under to base just to keep the model from tipping over.
Over all, I thought it was a very successful rescue attempt and the model is now decent enough for the tabletop.
Read more
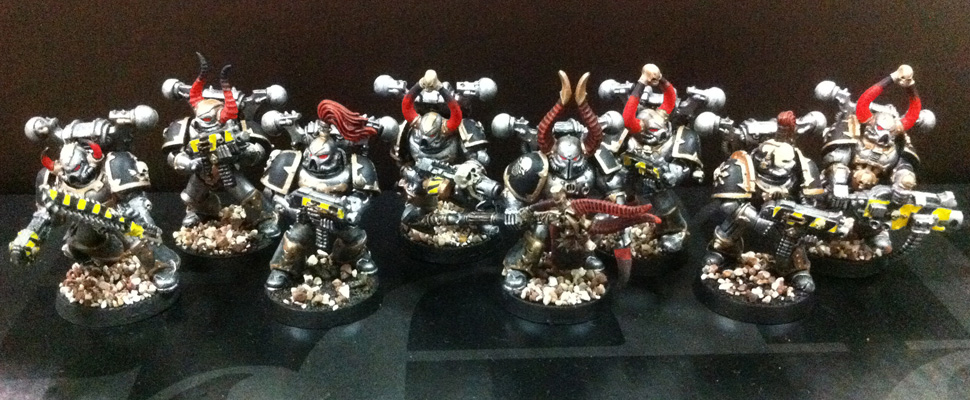
A quick guide on how I paint my Iron Warriors. I have previously posted this on my Flickr site but have decided to shift it here.
Some steps are staggered (e.g. Highlighting the model are sometimes several stages apart) in order to allow time for the paint to dry.
1) Prime black and touch up with Chaos Black
2) Apply Boltgun Metal to body
3) Wash model with a generous amount of Armour Wash
4) Paint the face with Bleach Bone (Cos I think Chaos Marines should be really pale and pallid)
5) Apply Dwarf Bronze to armour trim
6) Apply a brown paint (I mixed blood red and green cos I don't have brown paint) to the leather band holding the CSM's pony tail)
7) Apply a heavily watered down Blood Red to the Hair
8) Wash the Hair with Armour Wash, then Red Wash
9) Paint the weapon panel with Sunburst Yellow (requires multiple coats)
10) Paint on the hazard stripes onto the yellow area with Chaos Black and paint the little skulls on model with Bleached Bone
11) Drybrush Blood Red onto the hair to highlight the individual strands
12) Drybrush Boltgun Metal to the Armour on areas catching the light
13) Drybrush Mithril Silver as an extreme Highlight to the Armour on areas catching the light
14) Drybrush Shining Gold onto parts of the armour trim catching the light and added Armour Wash to the little skulls
15) Add Armour Wash to the Leather Hairband
16) Touch up the model on all areas that have been messed up
17) Apply Decal to shoulderpad
18) Varnished model with Vallejo Matte Varnish (2 layers on shoulderpads to protect the Decal, 1 layer on the rest of the model)
19) Applied coarse mixed sand to the base with Elmer's PVA glue and voila! One more Iron Warrior to field.
Read more